
The End of Edward II, Part Two: The Hermit King

Following the mysterious death of Edward II, recently deposed King of England, a group of monks from Westminster Abbey addressed the now truly widowed Queen Isabella. They asked that Edward be laid to rest beside his mother and father and grandfather in the royal mausoleum, a request they likely assumed would be granted. However, Isabella denied them. Instead, St. Peter’s Abbey Church at Gloucester would receive the royal corpse. Isabella may have insisted on this for numerous reasons: because its abbot was related to her nefarious advisor Roger Mortimer, because she feared a mob demonstration if Edward’s body were carried too far across the kingdom, or because there was, indeed, precedent for a deposed king not being buried at Westminster: Edward’s ancestor John, another failed monarch who had been laid to rest at Worcester. Today the tomb of Edward II at Gloucester is a grand edifice, with an alabaster effigy above it depicting him still wearing his crown and 28 statues of angels weeping round his marble sarcophagus. The tomb became so grand that eventually pilgrims to the abbey began to venerate him as a saint. However, all of this was a result of the abbots investing in their monastery as a pilgrimage site. Isabella never encouraged it to be a place of pilgrimage, and she never gave the church any money to improve the tomb. While this may be understandable, for her, what’s more strange is that his son, King Edward III, who would eventually go to great lengths to investigate his late father’s murder, also never patronized the tomb, leading some historians to ask why Edward II’s resting place was left forgotten by those closest to him.
Among the first signs that something was odd about Edward’s supposed death was the fact that his funeral was so long delayed. Edward’s corpse stayed unentombed at Gloucester for nearly two months. This delay could ostensibly be blamed on the continuing war with the Scots, or it could be explained by Isabella and Mortimer not wanting to seem too anxious to bury the former king, perhaps because they had something to hide or because they knew many believed they had something to hide. But what was it they were hiding? Their involvement in Edward’s death? If even the worst claims about Edward’s manner of death were true, there were still no visible marks upon his body to indicate murder. Why, then, did they not want anyone to view the corpse? Great care was taken to guard Edward’s body, which was common enough, but when crowds came to Gloucester to see him and were not permitted to view the body, a wooden likeness of him had to be hastily carved to appease the visitors. And many would later comment upon how far away from the open tomb they had been kept during the actual funeral, such that it was exceedingly difficult to actually examine his remains. Years later, as Edward III investigated his father’s murder and rumors abounded that Edward II had actually survived and gone into hiding, this odd funeral arrangement began to seem more and more suspicious.

The tomb of Edward II at Gloucester, via Wikimedia Commons
Immediately after the death of Edward II, Queen Isabella and Roger Mortimer went about the business of ruling the kingdom on behalf of the fifteen-year-old king. They sought a settlement with the Scots and prepared for Edward III’s marriage to Phillippa of Hainault, an arrangement Isabella had made in exchange for aid from Flanders during her coup. While this match pleased many, for young Queen Phillippa was well liked, not everyone was happy with the rule of Isabella and Mortimer. The earls whose alliance had ensured the success of her coup began to resent her. Some viewed Mortimer as yet another favorite, like Gaveston and Despenser before him, monopolizing the benefits of the throne, and the fact that many would lose lands in Isabella’s treaty with Scotland kindled further resentment. Her dealings with Scotland also ended up angering her son, the new king, who resented that she had given away his sister Joanna in marriage to Robert the Bruce’s son. When Isabella directed him to return to the Scots their sacred Stone of Scone, an artifact used in coronation ceremonies that legend identified as the Stone of Jacob, consecrated by that biblical figure after having a vision while using it as a pillow, Edward III made his disapproval clear, and taking a cue from their young king, rioting crowds prevented the artifact’s return. While the king might have coyly defied them, though, the earls dared not, for Isabella empowered her favorite Mortimer as the Earl of March, and together, having learned from Edward II’s mistakes, they put down any baronial opposition before it threatened them. Mortimer even began to claim descent from Brutus of Troy, the mythical son of Aeneas who supposedly discovered the British Isle, defeated the giants who inhabited it, and founded Britain, which was named after him, its first king. Mortimer’s hubris only worsened from there, and he started ruling without the young king’s decree, as if he himself were regent. Matters came to a head after Mortimer moved against the young king’s uncle, Edmund, the Earl of Kent, on charges of treason. Mortimer acted as prosecutor at the trial, producing letters that Edmund had penned that showed the Earl of Kent had been scheming to free his brother, Edward II. Edmund confessed that it was all true. The odd thing was, however, that he had been plotting to free Edward after Edward was dead and buried at Gloucester.
As the trial unfolded, it became clear that the Earl of Kent believed his brother was not dead but was in fact being held captive at Corfe Castle in Dorset, which would mean, of course, that someone else had been buried in King Edward II’s place. Edmund had been sharing this information with numerous bishops and barons, which had only aggravated opposition to Isabella and Mortimer’s rule. Indeed, it appeared that Edmund had even convinced Pope John XXII of his conspiracy theory and received approval for his plans to free his brother from captivity. Strangely, according to the court proceedings, Edmund had learned of his brother’s survival through the black magic of a Dominican friar. Wildly, this evil monk had supposedly received the incendiary information from a demon he had summoned. Of course, this tidbit made the Earl of Kent’s claims impossible to credit, making him seem delusional. However, Edmund had sought confirmation of this information first, and multiple informants had approached him to confirm that Edward II was alive and well at Corfe Castle. Some even claimed to act as go-betweens to establish communication between the brothers, thus the letters produced at trial. These were likely agents of Isabella’s or Mortimer’s, entrapping the former king’s brother into a treasonous plot. The fact is, there does appear to have been a rumor going around about Edward II’s death having been faked, and the trial of the Earl of Kent seems to have been Isabella and Mortimer’s way of discrediting the rumor, a kind of disinformation campaign. Judging from the profile of the people who had supported Edmund in his plot, including the Pope himself, it would seem the rumor had been far more believable than the details of the trial made it seem. Thus the story that it had originated with a demon-summoning friar might have been “fake news,” as it were, embellished in the trial to make the idea seem ridiculous, and the fact that Isabella and Mortimer had the Earl of Kent summarily executed, bribing a drunk dung-collector to cut off his head, further served to discourage those who might want to look into the possibility of Edward II’s survival.
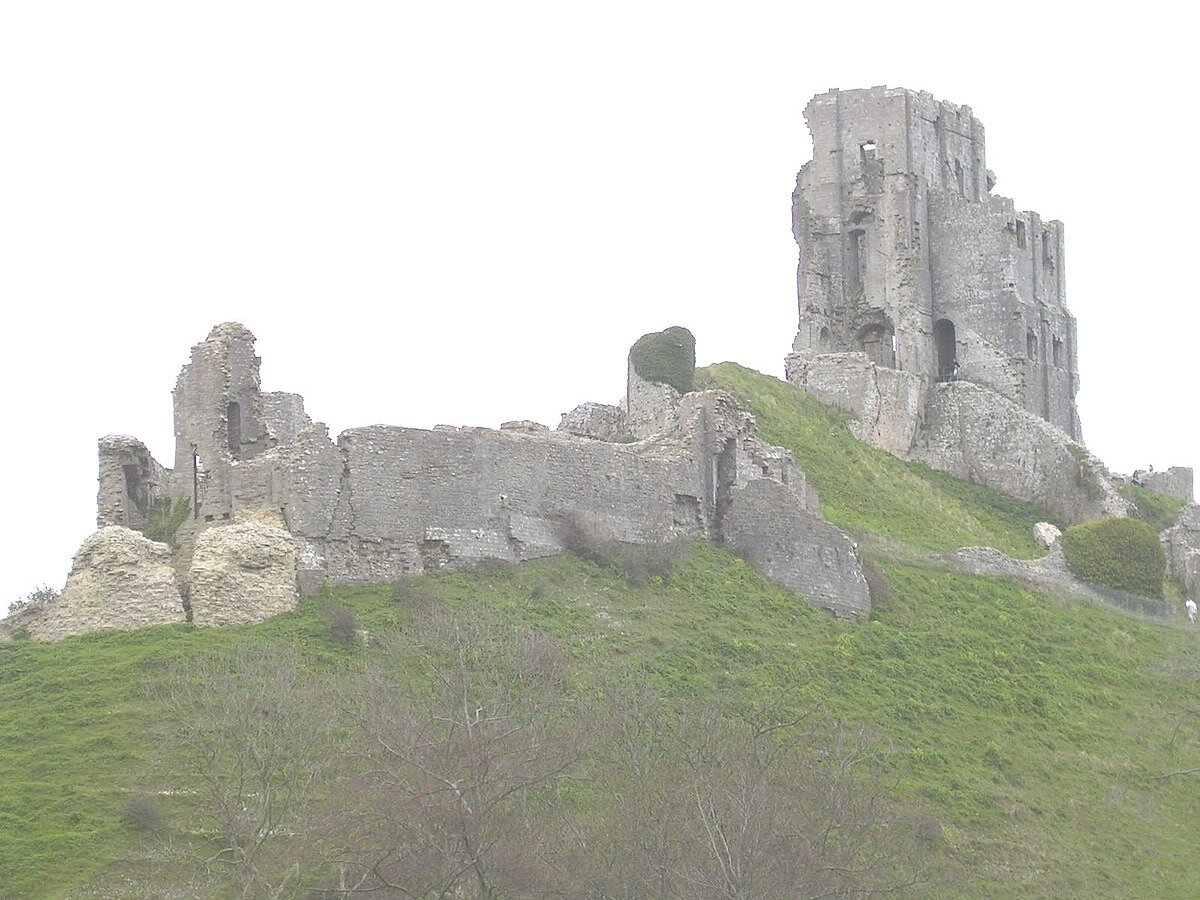
The ruins of Corfe Castle, where the Earl of Kent believed Edward II was in hiding, via Wikimedia Commons
No matter the true motives behind the entrapment of Edmund, Earl of Kent, whether it was to punish treason, to remove another possible claimant from the equation, or to squelch the rumors that Edward II had survived, King Edward III, reaching his majority and ready to take the reins of power himself, resented the execution of his uncle. Though his mother had a hand in it, he appears to have laid blame squarely on Roger Mortimer, who had overstepped his position and usurped the king’s authority. However, his power was limited and he was surrounded by spies. All he could do was carefully lay plans, gathering those loyal to him one at a time, and establishing a secret channel of communication with the Pope. Eventually, it became clear that the king was moving against Mortimer, and Mortimer responded by accusing the usual suspects, such as the Earl of Lancaster, of plotting against him, and seeking to constantly reaffirm his authority in the council. It was during this time, as factions were squaring off and edging toward conflict, that Mortimer was first publicly accused of ordering Edward II’s murder at Berkeley Castle. Mortimer responded by launching an official inquiry and interrogating some of Edward III’s men who had made the accusation. During the course of these interrogations, when Edward’s men stated that they only followed the orders of their king, Mortimer declared that the king’s authority only extended so far as it agreed with his own commands. When this presumptuous and treasonous declaration was reported to Edward III, or as legend has it, when he learned that his mother might actually be pregnant by Mortimer and that the child could be a rival for his throne, the king finally resolved to act. It was the evening of October 19th, 1330, and his mother and Mortimer were holed up at Nottingham Castle at the time, in a meeting plotting to arrest those loyal to her son. Meanwhile Edward III had bribed the castle’s constable to let him and some two dozen men into the castle by a secret entrance, a tunnel thereafter called Mortimer’s Hole. The meeting broke up in a panic when cries of “Treason!” resounded through the castle, raising the alarm over Edward’s attack, and Mortimer’s men met the king’s men in a stairwell, clashing with swords and daggers. Eventually, Edward broke through a barred door behind which his mother and Mortimer were hiding, and as Isabella begged her son to take pity on her lover, Edward III arrested Roger Mortimer, the great traitor.
King Edward III had mercy on his mother, ever afterward portraying her as the victim of the manipulative Roger Mortimer. None truly know how accurate this characterization of the Iron Virago might have been. Certainly she was not remembered well. Only a few years after he coup was welcomed by much of the kingdom, her downfall was equally well received. Her reputation is perhaps best illustrated by the immortal verse of Thomas Grey in the 18th century, who depicted her unsympathetically when he wrote: “She-wolf of France, with unrelenting fangs,/That tear'st the bowels of thy mangled mate.” Clearly, though, Edward III thought more highly of his mother and therefore took from her only her power and wealth, leaving her her freedom and keeping her in comfort for the rest of her days, never laying the crime of his father’s murder at her feet. However, Roger Mortimer he would execute the very next month, and thereafter, Edward III sought to make those accused of murdering his father answer for their crimes. These, of course, were Thomas Berkeley and John Maltravers, his jailers, and William Ockle and Thomas Gurney, his supposed assassins. All save Berkeley had fled after Mortimer’s arrest, and the king offered rewards for their capture or their heads. However, Edward III made some odd distinctions here that indicate more may have been going on behind the scenes, and even hinting that the king may not have been so certain about the circumstances of his father’s death after all.

In this 19th century image Isabella pleads with her son for Mortimer’s life, via Wikimedia Commons
Thomas Berkeley, who had been most responsible for Edward II’s safekeeping, strangely got off scot-free. He claimed that he had not been present in the castle on the day in question, and moreover, he bafflingly claimed that he didn’t even know Edward II was dead, that he only learned of it just then, as he was being questioned. Of course this was preposterous, and more than a little disrespectful, yet Edward III released him on bail and then cleared him of any charges. Why this was so seems a mystery, unless, as Paul Doherty postulates in my principal source Isabella and the Strange Death of Edward II, you consider his statement to be a pointed message. Perhaps Berkeley, by saying it was the first he’d heard of Edward II being dead, was really indicating to the king that as far as he knew the king’s father hadn’t died in Berkeley Castle, a kind of winking hint that the rumors of Edward II’s survival were true. Also curious is the fact that John Maltravers, Berkeley’s brother-in-law who had been at the castle on the night of the murder, was also not charged with regicide and instead was only charged for his part in the later conspiracy against the Earl of Kent. Additionally, evidence suggests that while Maltravers was in hiding in Flanders, the king knew where he was and did not arrest him. Indeed, Edward III eventually allowed him to return to England and come and go as he pleased. Doherty points out that, after arresting Mortimer, the king had more than five weeks to torture and interrogate Mortimer and his men before he eventually ordered the arrests. Who knows what information he learned during that time that convinced him Berkeley and Maltravers were not responsible for the murder of his father. Only William Ockle and Thomas Gurney were declared wanted for regicide, and the reward was set far higher for their capture than for their heads, indicating perhaps that the king believed there was still something to learn from them. Ockle vanished, but the king’s agents pursued Gurney for more than 2 years before he was taken in Naples. According to some of the great chroniclers of the age, such as the dubious Geoffrey le Baker of Swinbrook, whose credibility I questioned in the last episode, claim Gurney was beheaded in custody while on a ship bound for London, to prevent him from naming names, presumably Isabella’s or perhaps those of some barons who had managed to remain in the king’s good graces and did not want to be implicated. However, as Doherty points out, since Gurney could have been executed abroad before even boarding the ship, it seems likelier that Gurney died of an illness while on his way to face justice in England, as was the story told by the knight tasked with bringing him back. Curiously, after this knight reported back to King Edward III, likely telling the king everything he had been able to learn from Gurney before his death, Edward III ceased searching for those responsible for murdering his father, yet five years later, he seemed bent on hunting down a living man rumored to be his father.
In 1338, when King Edward III was leading his armies in the Low Countries, he heard about a man called William the Welshman who was in Cologne and had been telling people that he was Edward II. The king spent a significant amount of money having this person brought to face him in Antwerp. We don’t know anything about the meeting between Edward III and the man who claimed to be his father. Doherty suggests that this was actually William Ockle, whom the king had given up on finding and who might have escaped justice forever if he hadn’t been pretending to be Edward II, but this is speculation. What this does show with a certainty is that, years after Edward III had seemingly resolved the matter of his father’s murder by tracking down his assassin, he seems to have taken a great interest in the possibility of his father still being alive, indicating he may have had secret doubts at the very least or even that during his investigation five years earlier he had discovered proof that his father was still among the living somewhere. The other possibility, of course, is that he did not believe William the Welshman was his father but nevertheless took the claims of pretenders seriously. Indeed, this was not the first time someone had pretended to be Edward II. The first time had been when Edward II was still alive. In 1316, while Edward II was still licking his wounds after his defeat at Bannockburn 2 years earlier, a clerk from Oxford declared that he was the real Edward of Caernarvon. When questioned before the Justices, he pointed to a missing ear, explaining that he had been at play in the castle’s courtyard as a child, and when a pig bit his ear off, his nurse had switched him with a peasant boy, fearing the king’s anger over the incident. This pretender eventually revealed himself to be something of a crazy person, as during further investigations he produced a cat and confessed that his story was a lie, and that the cat, which was actually the Devil, had put him up to the charade. The Justices hanged him and, absurdly, hanged the cat as well. Considering that even this lunatic’s story had been something of a scandal, perhaps it is not unreasonable for Edward III to take seriously the claims of a random Welsh pretender in Cologne. And after all, since we don’t know what information his interrogations uncovered, there seems little evidence that Edward II did not die at Berkeley Castle in 1327. But actually, there was one well-documented event that I omitted in my telling of Edward II’s imprisonment that may serve to cast some further doubt upon the idea that he was even at Berkeley when he was supposedly murdered there: the story of a jailbreak.

A depiction of Berkeley Castle, where Edward II was held captive, was liberated by the Dunhead gang, and supposedly later was killed, via Wikimedia Commons
At the time of Isabella and Mortimer’s coup, there existed a secret alliance of loyalists, led by brothers Thomas and Stephen Dunhead. Thomas Dunhead, a clergyman, had gone to Rome on Edward II’s behalf seeking approval for a divorce from Isabella, and after his failure and return, when Isabella landed her forces, he and his brother, both still loyal to their king, became fugitives. They gathered others to the king’s cause, forming a kind of outlaw band. The threat that this conspiracy would break Edward II out of jail was what precipitated his transfer from Kenilworth to Berkeley in the first place. Interestingly, there is evidence that, during the transfer, to throw the Dunhead conspiracy off their trail, before taking him to Berkeley, they took Edward II to Corfe Castle, the very place where years later Edmund, Earl of Kent, believed he remained, alive and well. However, all records show that Edward II was eventually imprisoned at Berkeley. Records also show, though, that the Dunhead gang discovered his imprisonment there and that, against all odds, managed to storm the fortified castle with no siege equipment. Reports describing the jailbreak specifically state that Edward II had been taken from his cell, and there is no explicit indication that they recaptured him before the Dunheads escaped. This is just assumed, since those in power continued on as if the king were still in their custody, and then some months later letting it be known that he had died at Berkeley. Certainly members of the Dunhead gang were eventually caught and indicted for “trying to free Edward of Caernarvon,” as Isabella carefully worded it, but the fact that the Dunheads had Berkeley in their control for long enough to loot the castle would seem to indicate that their raid had been in no way repelled, that they might have seized all they wanted from the castle before taking their leave, including the royal prisoner. Therefore, it seems at least possible, and I imagine might have seemed plausible to Edward III as he looked into the mystery three years later, that the Dunheads had successfully spirited away the former king from his prison, and that Isabella and Mortimer simply pretended they hadn’t and shortly thereafter produced a corpse so that if Edward II ever resurfaced, they could argue that he was a pretender, for the true Edward II was entombed at Gloucester. Could this be the truth that Edward III uncovered while interrogating those involved? Was it finally confirmed by Gurney on his deathbed? Is this why he chose not to pursue further justice in the matter, and years later was curious about a Welshman claiming to be his father?
One further piece of evidence provides some reason to believe Edward II did not die at Berkeley, although with an alternate version of events. And while it may not prove its astonishing claims, it at least serves as strong evidence that his son, Edward III, suspected his father’s survival. Circa 1340, Edward III received a letter from a papal notary named Manuel Fieschi. In this letter, he explained that he met a hermit who claimed to be Edward II and took his confession. What he learned was that a guard of Edward’s at Berkeley had warned him of the assassins’ plans and offered to exchange clothes and trade places with him. This allowed Edward II to simply walk out of the castle, and when the assassins saw that the prisoner was not he, they murdered him and brought his body to Queen Isabella, who interred the guard in her husband’s tomb. After his escape, Fieschi’s letter claims he lived secretly under Maltravers’s nose at Corfe Castle for a year and a half. After hearing that his brother, the Earl of Kent, had been executed for believing he was alive at Corfe, he fled again, this time to Ireland, and began to disguise himself as a hermit. In this disguise, he made his way across the Continent, eventually seeking an audience with Pope John XXII. The Pope received him and honored him as King Edward II, and the Hermit King devoted himself thereafter to a religious pilgrimage, making his way to Cologne to visit the reliquary said to hold the bones of the Magi, the Three Kings present at the Nativity. Thereafter, he made his way to Italy, where he spent his years moving from one hermitage to another. This letter appears to provide accurate information regarding details about Edward II’s capture, and furthermore, its account of his hiding at Corfe Castle when the Earl of Kent believed he was there, as well as its suggestion that he was present in Cologne years later, perhaps when William the Welshman was there telling people he was Edward II, all give it a semblance of reliability. Moreover, the fact that two years after receiving the letter Edward III allowed Fieschi to keep certain lucrative English benefices at Ampleforth and Salisbury appears to show that the king didn’t think him a liar and may have even been rewarding him for the information he’d provided.

Edward III, son of Edward of Caernarvon and Isabella of France, who sought justice for Edward II’s murder and yet also seems to have been open to the idea that his father survived, via Wikimedia Commons
However, there are reasons both for and against crediting Fieschi and his claims. First, it seems suspect that Fieschi would freely give up secrets protected by the sacramental seal of confession, but there is some indication in the wording chosen by this papal lawyer that he might only be imparting information that was not part of the confession proper--that is, not sins for which the confessor was seeking absolution. And yet it still seems reckless that a fugitive Edward II would even risk revealing himself this way, even if he thought his secret safe with his confessor. Aside from this issue of plausibility, Fieschi’s letter is so accurate as to be almost unimpeachable, even displaying some inside knowledge of Edward II’s movements during the final days before his surrender to Lancaster. There are even hints that Fieschi had knowledge of the circuitous route taken by Edward’s captors to elude the Dunhead gang when transferring their prisoner to Berkeley. Oddly, though, when naming the assassins sent after the king, Fieschi names only Gurney and a henchman of Mortimer’s, Simon de Beresford, who had been hanged alongside Mortimer as complicit in his crimes but was not usually implicated as one of the assassins. Suspiciously, he excludes William Ockle entirely, who just happens to have been the one person who was still alive somewhere and might have contradicted the contents of his letter. Furthermore, as Paul Doherty wisely observes, it strains credulity that Roger Mortimer or the jailer Thomas Berkeley or his lieutenant John Maltravers would have put only a single guard on Edward II, especially one who sympathized with the king, and who happened to share the same physical stature and therefore wore clothes of a size that would fit the prisoner. Also implausible is the notion that a simple change of clothes would have sufficed to allow the easily recognizable king to stroll right out of the heavily guarded castle unchallenged. Nor is it easy to believe that , when the assassins realized the king had escaped, rather than raising the alarm and organizing a search, they settled on covering it up and faking the king’s death. In fact, the letter makes it sound like they actually pulled one over on Queen Isabella, as it states, “[T]he body of the said porter they presented to the wicked queen as if it were the body of your father,” but this line is problematic in numerous ways. First, it could be seen as exonerating the queen insofar as she wasn’t party to faking Edward II’s death, a choice perhaps made by Fieschi because of how consistently Edward III had defended his mother in these matters. However, the line calls her wicked, and the fact that the assassins reported to her directly implicates her as the mastermind of the murder plot. Of course, this does offer some explanation for why the assassins would even choose to take this course of action, perhaps because they were afraid of what Isabella would do to them if they reported the king’s escape, but it beggars belief that when they presented the guard’s body, Isabella would not have discerned that it was not her husband.
Then we have the scholarly assessment of the letter, and the investigation of its claims by Italian academics who assert that it is authentic. Constantino Nigra, in 1901, relied on the contents of the letter and what is known about Fieschi to argue that the letter is not a forgery, was truly written by Fieschi, and was written around the time it is supposed to have been written. Then 23 years later, Anna Benedetti, an Italian English professor building on a 1915 article by Hardwicke Rawnsley called “Did Edward II Escape to Italy?” began to trace the path of the Hermit King as outlined in the letter. One of the hermitages named in the letter, a castle called “Milasci,” she identified as Melazzo de Acqui, and today this tourist destination displays plaques commemorating Edward II’s stay there, although this is no proof of it being true. Another hermitage mentioned in the letter “Cecime,” proved more difficult to pinpoint. Benedetti settled on Cecime Sopra Voghera, a walled village in the Appenine Mountains, but there exists no castle there. Continuing her search, she found a secluded monastery nearby that fit the bill perfectly. She argues that King Edward II was likely buried in one of the churches owned by this monastery, for she found an empty and undecorated tomb in one of them. Now, Benedetti’s research goes much further than this. Like some other medievalist conspiracy theorists, she believes there are clues everywhere. Certain sculptures and details in the architecture, she says, provide a coded account of Edward the II’s life in hiding. Other historians have begged to differ, providing alternative interpretations of these so-called clues and presenting evidence that they are far too old to have been created for the purpose of telling Edward II’s tale. However, there does exist some testimony from locals suggesting there was a folk tradition in the area about an English king having lived in hiding there, a legend that if the testimony can be believed, actually predates not only the scholarly work identifying that region with Edward II’s place of hermitage but even predating the 1878 discovery of the Fieschi letter.

A plaque at the Hermitage of St. Albert di Butrio suggesting Edward II may have lived there after his supposed death, via Atlas Obscura
Beyond these facts stands Fieschi’s reputation. If as Nigra argues we can trust that Fieschi wrote this letter, his credibility alone would seem to make it trustworthy. Fieschi was a high-ranking cleric, a canon and an arch-deacon, a notary of the Pope, and eventually, a Bishop. Nevertheless, Paul Doherty, in Isabella and the Strange Death of Edward II, provides ample reason to doubt Fieschi’s character and his motives in penning the letter, pointing out that while he was a man of the cloth, he appears to have been far more interested in money than in matters of the spirit. He was a papal tax-collector, and even while away in Italy, he collected money from his various benefices, like an “absentee landlord,” as Doherty characterizes him. He points out that Fieschi had received more benefices and offices under Isabella and Mortimer than under Edward II, suggesting that the Iron Virago and her traitorous paramour may have been bribing him to act as their agent in the papal court, supporting their version of events, for example, when they put down the Earl of Kent’s conspiracy and attempted to quash the rumor that Edward II was still alive. Doherty suggests that when Edward III took power and thereafter began refusing benefices to foreigners and even charging them for any English property they might be granted, Fieschi was looking for a way to make himself just as useful to the new king. He had plenty of insider information about the Earl of Kent’s theories from having spent time in England and from acting as the Pope’s notary. While before, when he was being taken care of by Isabella and Mortimer, he likely supported the claim that Edward II was killed and entombed at Gloucester, later, to indicate to Edward III that he could pose a problem by resuscitating an old conspiracy theory, he might have written this letter in hopes that the new king would bribe him to keep the matter silent. And indeed, shortly afterward, Fieschi was awarded his first bishopric, and the matter of Fieschi’s Hermit King never came to light until the letter was discovered in the 19th century.
This version of events is perfectly believable as an explanation of the letter, yet explaining away the letter does not necessarily disprove the theory of Edward II’s survival. Even Doherty, after casting such doubt on Fieschi’s letter, gives credence to the idea that Edward II may not have died at Berkeley, focusing instead on the suspicious circumstances of the Dunhead gang’s successful jailbreak as the likeliest way that Edward avoided death. He points to the fact that after the jailbreak, Roger Mortimer himself was obliged to leave the queen’s side and travel to Wales to deal with the matter of the escaped royal prisoner. It makes far more sense, then, if they could not manage to find Edward II, to simply pretend he was dead. It is in fact, a cunning play, whereas just assassinating him when they already had him imprisoned seems needlessly dangerous. In this light, almost everything in the story falls into place. A local wise woman was hired to do the embalming instead of a royal physician, who would surely have recognized that the corpse did not belong to the king. Indeed, perhaps the queen met with this embalmer not to discern whether she’d observed evidence of murder, but rather to investigate whether it truly was her husband’s corpse… or to make certain that the embalmer did not realize it was not the king’s body. And it further explains why the casket was kept so far away from viewers at the funeral, and why Edward II was not laid to rest with his father and grandfather at Westminster Abbey, for perhaps they knew that these were not the remains of the king and did not belong there. It also accounts for the fact that Isabella never honored her late husband’s tomb at Gloucester, for it wasn’t actually him buried there. Indeed, the fact that Edward III also never patronized his own father’s tomb would seem to indicate that he eventually learned this truth about the identity of the person entombed there. On the other hand, Anna Benedetti found some ornate candlesticks displayed at a museum in Turin that were said to have come from the monastery in Italy where she believes Edward II was really buried, and she asserts that they may have been gifts from Edward III to honor his father’s true resting place. They were engraved with lions, the symbol on the Arms of the House of Plantagenet. If this is true, then we can assume that the son finally solved the mystery of the fate of his father, the Hermit King. But of course, this is only one version of history, perhaps just as convincing as another. The truth may be somewhere in between or something that none have yet discovered.
Further Reading
Doherty, Paul. “Isabella and the Strange Death of Edward II.” Carroll & Graf, 2003.
Weir, Alison. “Queen Isabella: Treachery, Adultery, and Murder in Medieval England.” Ballantine, 2006.